
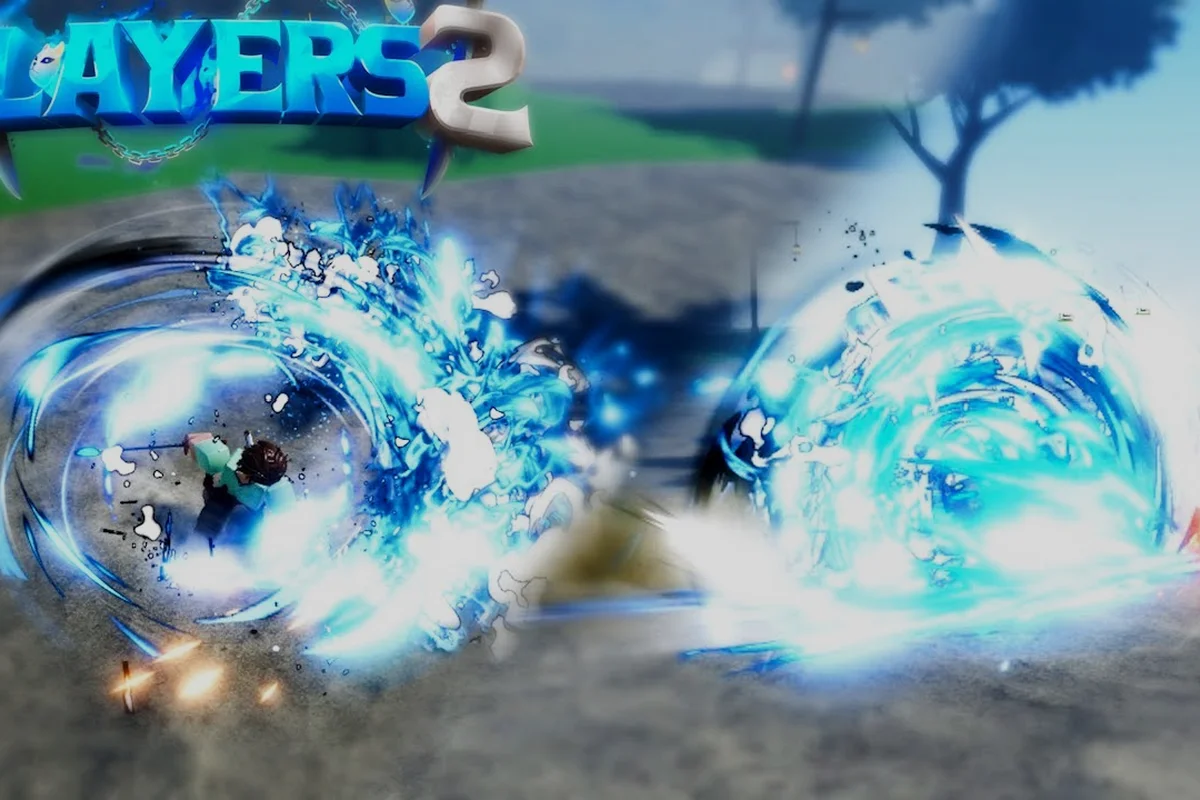
Total concentration breathing sits at the core of every serious Slayers 2 build because it converts raw breath capacity into sustained damage pressure. When you activate the technique, your character enters a heightened state that drains the breath meter while amplifying your breathing style passives and sword skill output. Understanding exactly how the meter refills, when to toggle the state, and which breathing styles benefit most in PvP separates players who trade evenly from those who control every exchange.
How the Slayers 2 Breath Meter Works
The breath meter in Slayers 2 functions as a resource bar that governs how long you can maintain total concentration breathing. Unlike a standard stamina pool that regenerates passively during combat, the breath meter follows a more deliberate rhythm that rewards timing and punishes reckless activation. When the meter empties, your character exits the concentrated state and suffers a brief recovery window before you can reactivate the technique.
Meter Drain and Recovery Mechanics
Community testing on the shared r/ProjectSlayers board indicates that the meter drains at a variable rate depending on your current breathing style and whether you are mid-combo or idle. The base drain while standing still is noticeably slower than the drain during sword skill execution, which means players who activate the state too early in a fight often find themselves empty-handed when the opponent commits to a real push.
Meter behavior by combat state:
| Combat State | Drain Rate | Recovery Delay | Notes |
|---|---|---|---|
| Idle / walking | Slow | None | Safe for repositioning |
| Blocking | Moderate | 0.5s after release | Slight penalty for turtling |
| Sword skill active | Fast | 1.0s after skill ends | Highest burst cost |
| Taking damage | Very fast | 1.5s after hitstun | Punishes poor trades |
The recovery delay is the hidden mechanic most players miss. Because the meter does not begin refilling immediately after you exit the concentrated state, there is a short window where you are both unbuffed and unable to reactivate. Skilled opponents watch for this exact moment and commit to their strongest string.
Why the Meter Punishes Early Activation
Activating total concentration breathing at round start feels natural, but it is often the wrong play. The meter drains even when you are not landing hits, which means an opponent who plays defensively for the first ten seconds can force you to waste your entire resource pool before the real exchange begins. Instead, the strongest players treat the technique as a commitment tool that they activate only when they have a clear read on the opponent's movement pattern.
How Passives Modify Breath Meter Recovery
Every breathing style in Slayers 2 carries a passive effect that becomes significantly stronger while total concentration breathing is active. The interaction between your chosen style and the concentrated state is not uniform, and some passives scale far better with the meter than others. Understanding these interactions is the first step toward building a PvP loadout that actually threatens opponents.
According to the official Roblox game page for Slayers 2, Total Concentration Breathing is implemented as a timed breathing minigame that, when completed successfully, grants a temporary boost to damage and movement speed.
Passive Scaling by Breathing Style That gap is why community testing on the breath meter matters so much: the in-game tooltip is sparse, and most of what players know about the meter comes from frame-by-frame testing rather than documentation.
The official Ouw Productions YouTube channel has published mechanic showcases for Sound, Flame, Thunder, Water, Wind, Stone, and Insect breathing, and each showcase demonstrates how the style's passive behaves under concentration. While the studio does not publish exact percentage values, community testing has produced consistent enough results to rank the passives by their concentration synergy.
Breathing style passive scaling under total concentration:
| Breathing Style | Passive Effect | Concentration Synergy | PvP Rating |
|---|---|---|---|
| Thunder | Movement speed + dash distance | Very high | S-tier |
| Flame | Burn damage on sword hits | High | A-tier |
| Water | Damage reduction while blocking | Moderate | A-tier |
| Wind | Attack speed increase | High | A-tier |
| Stone | Stagger resistance | Moderate | B-tier |
| Insect | Poison buildup on hit | Moderate | B-tier |
| Sound | AoE stun on skill use | Low | B-tier |
Thunder breathing stands out because its movement passive multiplies the value of every meter tick. When you can close distance faster and extend your dash while concentrated, you force the opponent to react on your terms rather than the other way around. Flame breathing is a close second because the burn damage continues ticking even after your meter empties, giving you residual pressure during the recovery window.
Choosing a Passive for Your Playstyle
The right passive depends on whether you prefer to initiate or counter. Aggressive players who want to dictate the pace should look at Thunder or Wind, because both passives reward forward movement and quick skill chains. Defensive players who prefer to bait and punish should consider Water or Stone, since their passives make it easier to survive the opponent's concentrated burst and then retaliate when their meter runs dry.
For a broader breakdown of how each style plays in practice, the Slayers 2 breathing styles overview covers trainer locations and unlock requirements for every option. Cross-referencing that overview against your own clan bonuses is worth the extra few minutes, because the meter interacts with attack speed passives in ways that are easy to overlook.
Slayers 2 Breathing Sword Requirement
You cannot activate total concentration breathing with just any weapon equipped. The technique requires a sword that meets the minimum compatibility threshold for your current breathing style, and the requirement scales as you progress through the game's content. Players who try to activate the state with an incompatible or underleveled sword will find the input simply does not respond.
Sword Compatibility and Minimum Thresholds
The sword requirement is not a single universal number. Each breathing style has its own minimum sword tier, and the threshold increases when you unlock advanced style techniques. A sword that works fine for early-game training may fail to support total concentration breathing once you have invested points into your style's skill tree.
Sword requirement progression by stage:
| Game Stage | Minimum Sword Tier | Concentration Available | Notes |
|---|---|---|---|
| Early training | Basic iron sword | Yes | Only base passive applies |
| Mid-game | Tempered steel sword | Yes | Full passive scaling |
| Late-game | Forged style-specific sword | Yes | Advanced skill chains enabled |
| PvP ranked | Masterwork sword | Yes | Required for competitive play |
The weapon requirement also interacts with your breathing style passive. A Thunder breathing user with a low-tier sword will still get the movement speed bonus, but the dash distance extension will be capped until the sword meets the style's threshold. This creates a hidden gear check that many players only discover when they enter ranked PvP and find their movement feels sluggish compared to opponents.
Upgrading Your Sword for Concentration
Sword upgrades in Slayers 2 follow a material-based progression that requires you to farm specific resources from bosses and open-world events. The Slayers 2 weapons guide breaks down the best sword options for both slayers and demons, including damage comparisons that matter when you are deciding where to invest your upgrade materials.
The key insight is that sword compatibility is not just about raw damage. A sword with slightly lower attack power but full concentration compatibility will outperform a higher-damage sword that caps your passive scaling, because the concentrated state amplifies your entire kit rather than just your basic attack string.
Slayers 2 Breathing Style PvP Timing and Strategy
PvP in Slayers 2 revolves around meter management more than any other single mechanic. Because both players have access to the same resource system, the winner is usually the one who forces the opponent to spend their meter inefficiently while preserving their own for the decisive exchange. This section covers the timing patterns and strategic frameworks that separate consistent winners from players who rely on raw reaction speed.
The Three-Phase Meter Framework
Every PvP round can be broken into three distinct phases based on meter states. Understanding which phase you are in at any given moment tells you whether to pressure, bait, or commit, and the best players transition between phases fluidly rather than sticking to a rigid script.
PvP phase breakdown:
| Phase | Meter State | Optimal Play | Common Mistake |
|---|---|---|---|
| Opening | Both full | Probe with safe pokes | Activating concentration immediately |
| Mid-fight | One or both partial | Bait opponent's activation | Trading meter for no damage |
| Endgame | One or both empty | Punish recovery window | Overextending without meter |
The opening phase is where most players lose the round before it really starts. Because the breath meter drains even when you are not landing hits, activating total concentration breathing in the first three seconds gives your opponent a clear signal to play defensively and wait out your resource. Instead, use the opening to test their block timing and dash habits with basic sword pokes, then activate only when you have confirmed a pattern you can exploit.
Baiting the Opponent's Activation
One of the most effective PvP tactics is deliberately forcing the opponent to activate their concentration early. You can do this by applying light pressure with safe pokes and then backing off, which creates the illusion that you are about to commit. Many players respond to this pressure by activating their own concentration in anticipation of your push, and once they do, you simply disengage and let their meter drain.
The counter to this bait is patience. If you recognize that your opponent is trying to bait your activation, the correct response is to match their passivity and force them to make the first real commitment. This creates a standoff where the player with better meter discipline eventually wins, because the first person to activate without a clear opening is the one who loses the resource war.
Punishing the Recovery Window
The recovery window after the breath meter empties is the single most punishable moment in Slayers 2 PvP. During this window, the opponent cannot reactivate concentration, their passive scaling is disabled, and their movement options are limited. If you have preserved even a small portion of your own meter, this is the moment to commit everything.
The best players track the opponent's meter visually and mentally. When you see the concentrated state flicker and drop, you know the recovery window has begun, and you should already be moving into your strongest skill chain. The window is short, so hesitation costs you the punish, but committing too early means you waste your own meter on a target that is not yet vulnerable.
Slayers 2 Best Breathing for PvP
The question of which breathing style is best for PvP does not have a single answer, because the optimal choice depends on your preferred playstyle and how well you manage the concentration meter. However, community data from the shared Project Slayers subreddit and official showcase videos points to a clear top tier that consistently performs well across different matchups.
Top PvP Breathing Styles Ranked
The following ranking reflects community consensus as of the current patch, based on tournament results, ranked ladder performance, and player-reported matchup data. Individual results will vary based on your execution and meter discipline, but these styles give you the strongest foundation for competitive play.
PvP breathing style tier ranking:
| Tier | Breathing Style | Strengths | Weaknesses |
|---|---|---|---|
| S | Thunder | Best mobility, hard to punish | Requires precise dash timing |
| S | Flame | Burn pressure, strong burst | Predictable skill patterns |
| A | Wind | Fast attack chains | Lower damage per hit |
| A | Water | Strong defense, good trades | Passive playstyle |
| B | Stone | High stagger, tanky | Slow movement |
| B | Insect | Poison chip damage | Weak burst |
| B | Sound | AoE control | Low single-target damage |
Thunder and Flame occupy the S-tier because their passives scale so well with total concentration breathing. Thunder's movement speed and dash distance extension make it nearly impossible for opponents to land a clean punish during your concentrated state, while Flame's burn damage continues applying pressure even after your meter empties. If you are new to PvP and want a style that forgives meter mistakes, Flame is the safer starting point.
Matching Style to Matchup
No single style wins every matchup. Thunder struggles against Water because the damage reduction passive makes it harder to convert your mobility advantage into actual damage. Flame struggles against Stone because the stagger resistance lets the opponent trade through your burn ticks and land heavier hits in return. Understanding these matchup dynamics is more important than chasing the theoretical best style.
If you are still deciding which style to commit to, the beginner breathing style guide covers the rarest and strongest options with practical advice for your first unlock. Committing early to a style you understand deeply beats spreading mastery thin across several, since the concentration mechanic rewards timing precision over breadth.
Frequently Asked Questions
What does total concentration breathing do in Slayers 2?
Total concentration breathing activates a heightened combat state that drains your breath meter while amplifying your breathing style passive and sword skill output. The state lasts until the meter empties, after which a short recovery window prevents immediate reactivation. Timing the activation is the core skill in high-level PvP.
How do I refill the breath meter faster?
The breath meter refills automatically when you are not in the concentrated state, but there is a brief delay after the state ends before refilling begins. Avoiding damage and sword skill usage during this window speeds up recovery. Some breathing styles and gear pieces reduce the recovery delay, but the base mechanic remains consistent across all builds.
Can I use total concentration breathing without a sword?
No, the technique requires a sword that meets your current breathing style's minimum compatibility threshold. The requirement increases as you progress and unlock advanced style techniques. Attempting to activate the state with an incompatible or underleveled sword will not work, and the input will simply fail to respond.
Which breathing style is best for PvP beginners?
Flame breathing is the most forgiving PvP style for beginners because its burn damage continues applying pressure even after your concentration meter empties. This residual damage gives you value from every activation even if you mistime the state. Thunder breathing is stronger in skilled hands but punishes meter mistakes more severely.
Does total concentration breathing work differently in PvE?
The core meter mechanics are identical in PvE and PvP, but PvE enemies do not punish the recovery window the way human opponents do. This means you can activate the state more freely during boss fights and open-world combat without worrying about a skilled opponent exploiting your empty meter. PvP demands much tighter activation discipline.